ArcadeCab
12/20/10
 Luciano's Cabinet
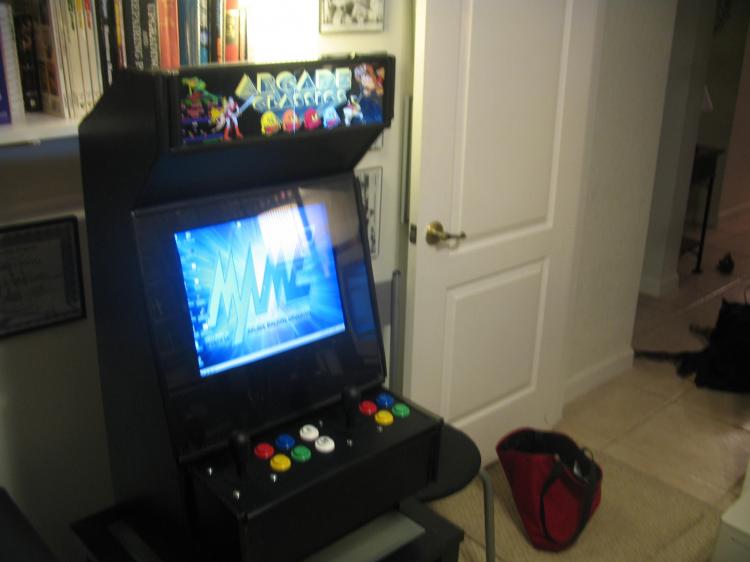
Luciano recently finished his arcade, and just in time for Christmas.
He used black laminated particle board to greatly reduce the amount of
painting required. His marquee was designed to include all of his arcade favorites.
There are two more pictures on the Visitor Page.
10/24/10
 Eric's Cabinet
Eric B used a
TankStick in his arcade, and a beautiful 27" Wells Gardner
arcade monitor with bezel. He used chrome T-molding throughout, and
even replaced the molding on the controller. The arcade also sports
two Playstation keypads, and two USB EMS TOP Light Guns. The coindoor
he added just "for show".
Hyperspin is the front-end he
uses for his ever growing collection of games.
The marquee was purchased but the remainder of the artwork is Eric's own.
There are a couple more pictures on the Visitor Page.
7/29/10
Donald's Cabinet
Donald F sent me an email describing his build. From his email:
"I now have my old Dell Dimension 8400 running a Maximus Arcade frontend in my “Ultimate Arcade” cabinet with many thanks to you. I did go with the X-Arcade Tankstick, as I wasn’t ready to tackle building a custom controller just yet. I have a couple of tweaks up my sleeve to share. I had some adhesive backed Velcro left over from mounting the speakers, so I added strips under the Tankstick and on top of the cradle in the cabinet. It makes the Tankstick solid, but also removable, if need be. Just work a small screwdriver between the hoops and hooks.
I had a bit of fortune too. On the downside, I didn’t order all my supplies from Happ at the same time. So that meant my late order for the marquee retainer was not meeting the minimum website order amount. But what could I add at this late stage? How about add an actual coin door minus the internals (item # 40-0713-00). It’s not that much more expensive than a vinyl cut out. I tossed in some red 4-LED Wedge Bulb (www.superbrightleds.com) lighting for the reject buttons. I ended up with the look I wanted. Plus, I used the tip from your visitor’s page and made the PC’s power button accessible through the open coin door. Sweet."
He uses a 19" monitor in the cabinet. There are a couple more pictures on the Visitor Page. Very nice work!
7/21/10
My Blog
A little off topic but I have finally hopped on the blogging bandwagon. The
past six months I've wished I had an avenue to document some of my home
PC-related projects, as well as post about cool new software , hardware and
gadgets I've run across. But I've always had too many other projects that need
worked on to take the time to write everything up. A couple weeks ago, while
keeping an eye on my oldest playing in the backyard, I compiled a fairly decent
list of topics that interested me enough to write up. After a little research
on the various blogging software packages available, I decided to just use the
WordPress one-click install that my web host, DreamHost, provides. I'm
currently working to understand all its capabilities. Feel free to take a look
at the blog; perhaps you'll find something of interest to you.
miketrellosblog.arcadecab.com
3/6/10
Noah B's cabinet
 Noah
discovered MAME machines last year and, as many of us, became obsessed with
them. At some point in his research, he stumbled up this site.
Noah's project began as a gift but he "selfishly" reconsidered once he
realized how expensive and time consuming it would be. He knocked out
the project in a quick month. Nice job!
Noah
discovered MAME machines last year and, as many of us, became obsessed with
them. At some point in his research, he stumbled up this site.
Noah's project began as a gift but he "selfishly" reconsidered once he
realized how expensive and time consuming it would be. He knocked out
the project in a quick month. Nice job!
There are a
couple more pictures on the Visitor Page.
6/20/09
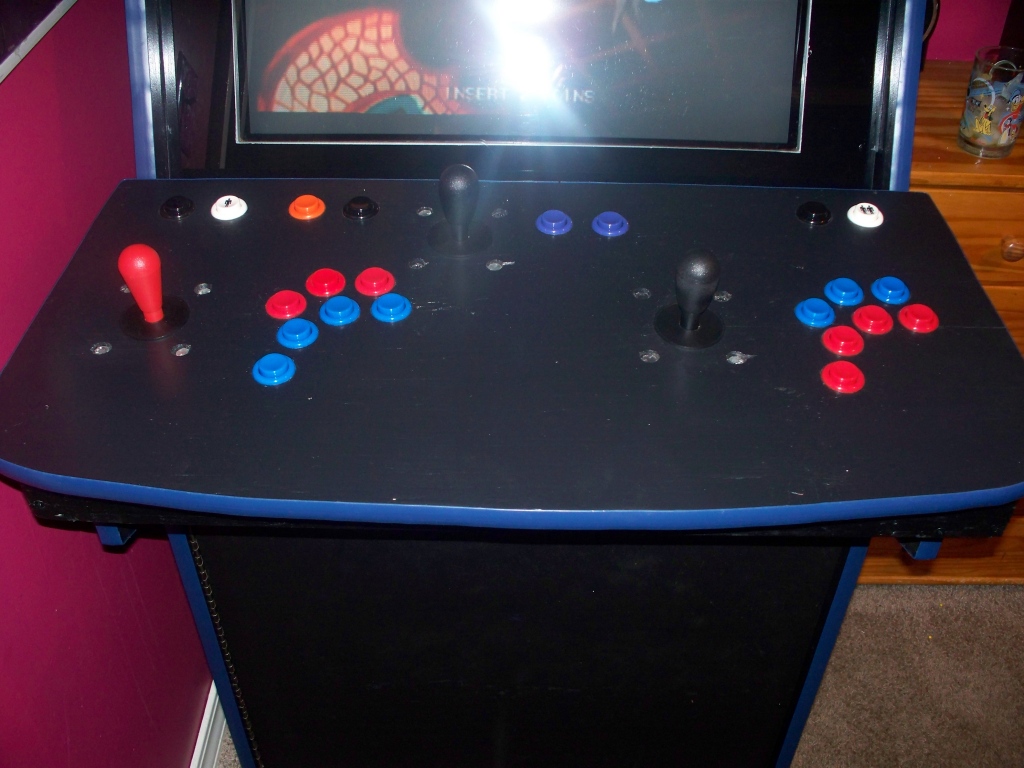
Introducing Jose C's cabinet
Jose built this beauty from the
second set of plans,
with some alterations required by the 27" television he used. He
modified the width, decreased the depth of the drawer, and recessed the
monitor glass a bit more. The control panel is his work as well.
Very nice work Jose!
There are a few extra pictures on the Visitor Page.
5/10/09
 Michael's
new cabinet
Michael's
new cabinet
Michael L informed me he has recently completed a small
Barcade project, partly inspired by
mine.
Having some parts left over from his original cabinet build (see the 11/09/08 item
further down this page), he decided to design his own mini-arcade. He
has written an excellent
step-by-step article on Retrojunk, detailing his build. He has
included a ton of photos of the steps, with many great suggestions on how to
build the project on the cheap. It is a very informative. Give
it a read.
5/4/09
Derek M's Control Panel
Derek M sent along pictures of his completed control panel. I
know Derek from back in the early days of ArcadeCab, when he
originally built his cabinet. His cabinet is the fourth from
the bottom on the
Visitor Page
to give you an idea of how long ago (five years). He had gone
down the same path as myself- build the cabinet and use an X-arcade
until he knew exactly what he wanted on his control panel.
Flash forward a few years, and he is helping a friend build a cab
from my second set of plans. This, as Derek says, "inspired"
him to finally build his own, custom panel. He used Happ
Supers (a great choice), a Betson trackball, TurboTwist2 spinner and
a GPWiz32 Rotary-capable unit to control it all.
 His
cabinet has been humming along famously all this time and his son,
who was just born when he completed the cabinet, is growing up
playing the classics. You can't get much better than that!
His
cabinet has been humming along famously all this time and his son,
who was just born when he completed the cabinet, is growing up
playing the classics. You can't get much better than that!
I have included a few construction pics of his on the
Visitor Page.
4/18/09
 Chris
G's cabinet
Chris
G's cabinet
Chris sent me a couple pictures of his recently completed cabinet.
More pictures are on the
Visitor Page.
3/14/09
Brad G's cabinet
Brad G forwarded me shots of his finished cabinet. He used the
TankStick and
HyperSpin as the
front-end.
He used plexiglass for the monitor bezel, painted the back with
the Duramax paint, and used molding to surround the bezel. For added peace
of mind, Brad placed a 2x4 beneath the controller (which necessitated
routing the keyboard drawer to accommodate the keyboard).
Brad decided to try something different with his coindoor as he was most interested in just the lights. He purchased the UNREAL Coindoor from Groovy Game Gear (click here for close-up photo). This product is a photorealistic vinyl reproduction that he stuck in place after routing the area. A 1/8" piece of plexiglass is mounted over it. Brad then drilled out holes for two coin slot buttons, and wired them to the credit buttons on the TankStick.
Good work!
3/1/09
Blake W has completed his cabinet
Blake W sent me a very nice email this morning describing his recently
completed cabinet. Excerpted from his email:
I guess this journey has come to an end. Although we've never spoken before you have helped me greatly. My arcade cabinet is finally complete. I was interested in building an arcade cab (after seeing your website) back when I was in High School but never had the money or the space to afford one under my parents roof. Fast forward 8 years, I graduated college, have my own apartment, and a great job that hopefully will last through this crazy economy. After seeing another one of your visitors cab's (CZARCADE) through a local LAN group I became re- inspired to complete a cab. I visited with CZAR and picked his brain as well as some of this leftover parts to build my own. I biggest difference is an additional three inches of height added to the bottom since I stand at 6'5". The cab runs off a HP d530 with a 2.8 Ghz processor with 1 gig of ram with a 21" CRT. (...) The entire cab was built and painted (except for the colored sides and the coin door) over the long memorial day weekend. I waited for a deal on the coin door and was rewarded by only paying 27 bucks. The sides were then finally painted this week.
The cabinet turned out quite
nice, in my opinion. The painted sides look first rate. As always, a
few more pictures are featured on the
Visitor Page.
2/25/09
PDF document of the Second Set of Plans now available
I have created a simple PDF document of all the pages in the second set of
plans. I did not include most of the full screen photos- you'll still
have to visit here to for those. The document will be nice for those
individuals who have perused the pages on the site and now want a printed
document to have in their hands to write notes on, and refer to during the
construction process. I have had two emails asking about such a
document in the past week so decided it was time. I hope it helps you.
Enjoy!
2/6/09
 James
P's completed cabinet
James
P's completed cabinet
Being snowed in the last few days worked in James' favor; it allowed him
time to finish up his cabinet (see his November 9th news item below for
progress shots).
He is driving the cabinet with an AMD2400 processor running the Gamex frontend. A 19" ViewSonic LCD provides the display. If you look carefully, you'll note he reduced the depth of the cabinet because he used the LCD. James said that did create a few problems when it was time to insert the PC, but he successfully maneuvered a smaller case in at an angle.
Some of the other features he included: Mini-USB keyboard and mouse on his slide-out tray, cold cathode marquee lighting driven by the PC's power supply, hidden power button and marquee light switch, Power Griffin USB that controls the volume, and a home printed marquee and side art.
He estimated the entire project, software included, took about forty hours. Great job!
More pictures are on the
Visitor Page.
1/27/09
Richard B's BarCade
Richard B built a barcade using a modified version of my plans. He
used a 17 inch monitor, and added a nice marquee. He used Mala as the
front-end.
More pictures are on the Visitor Page.
1/12/09
Doug M's Cabinet
Doug M sent me the following
email:
I, like most guys my age growing up, we were dropping quarters in our local
hometown Arcades. Oh the memories of playing my favorite arcade games like
Galaga while listening to AC/DC, Journey and Foreigner. That was before the
home video game consoles became popular, thereby killing many of our
childhood hangouts. Very sad... so I said if I ever struck it rich I would
like to have my own arcade at my house. Well I never struck it rich... but
that is when I found out about M.A.M.E. (Multiple Arcade Machine
Emulator) and I could house all, and I do mean all, the arcade games on one
machine versus a room full of individual machines. Now I can relive playing
many of the classic arcade, console and pinball games to boot! But all I had
to do was build it...
That's right, I built it from scratch! It only took me about a week with
basic tools. Now when I told my wife what I was about to do, she thought I
was crazy (much like you reading this story). But when I told her she can
play her one and only favorite arcade game Centipede, there appeared a grin
on her face...
Ubergamer was born; it has about 9000+ individual video games running
through a GameEx frontend and X-arcade Tankstick. It emulates all the games
and I do mean all the games from Arcade (MAME), Laser Disc Games (like
Dragon's Lair and Space Ace), Nintendo, Super Nintendo, Nintendo 64, Sega
Genesis, Sega Saturn, Sega Dreamcast, TurboGrafx 16 and yes, even Pinball!
This cabinet even has a MP3 jukebox, DVD/Movie player, Comic Book Viewer and
it's still a fully functional WinXP computer.
Doug still wants to add sideart; I'll be sure to add that picture when he sends it. Very nice job.